Fire Door Photography Best Practices
Photography guide for fire door surveyors. Capture clear photos that document defects, support reports, and provide evidence for clients.
Good photography is essential to fire door inspection. Photos provide evidence that supports your findings, helps clients understand issues, and creates documentation that stands up to scrutiny.
Bad photos waste time, create doubt, and can undermine otherwise solid surveys.
This guide covers practical photography techniques for fire door surveyors.
Why Photos Matter
Evidence
Photos prove what you found:
- “The gap is excessive” is an opinion
- “The gap is excessive — here’s a photo showing my gauge at 6mm” is evidence
If your findings are ever questioned, photos are your defence.
Client Understanding
Many clients aren’t fire door experts. Photos help them see what you’re describing:
- “The intumescent seal is missing” is abstract
- A photo showing the empty groove makes it concrete
Photos bridge the gap between technical language and visual reality.
Regulatory Compliance
For higher-risk buildings under the Building Safety Act 2022, documentation requirements are significant. Photo evidence forms part of the building’s safety record and may be reviewed by building safety regulators.
Remediation Guidance
Contractors fixing defects need to understand what they’re dealing with:
- What’s the current condition?
- What exactly needs doing?
- What does “correct” look like nearby?
Photos help remediation contractors quote and work accurately.
Essential Shots
Every Door: Overview Photo
What to capture:
- Full door visible
- Door in closed position
- Surrounding frame visible
- Location identifiable if possible
Purpose:
- Proves you were at that door
- Shows general condition
- Provides context for detail shots
- Helps client identify which door
Defect Documentation
For each significant defect:
- Close-up showing the issue clearly
- Reference point if helpful (gap gauge, finger, etc.)
- Context showing where on door
Examples:
| Defect | Photo Should Show |
|---|---|
| Excessive gap | Gap gauge inserted showing measurement |
| Missing seal | Empty groove where seal should be |
| Damaged door leaf | Extent and nature of damage |
| Faulty closer | Issue (leaking, damaged, wrong type) |
| Wrong hinges | Hinge type and count |
| Missing signage | Where sign should be (or damaged sign) |
Certification Labels
When visible:
- Certification/plug labels
- Manufacturer identification
- Any markings indicating fire rating
These help verify the door specification and may be needed for future reference.
Camera Settings and Technique
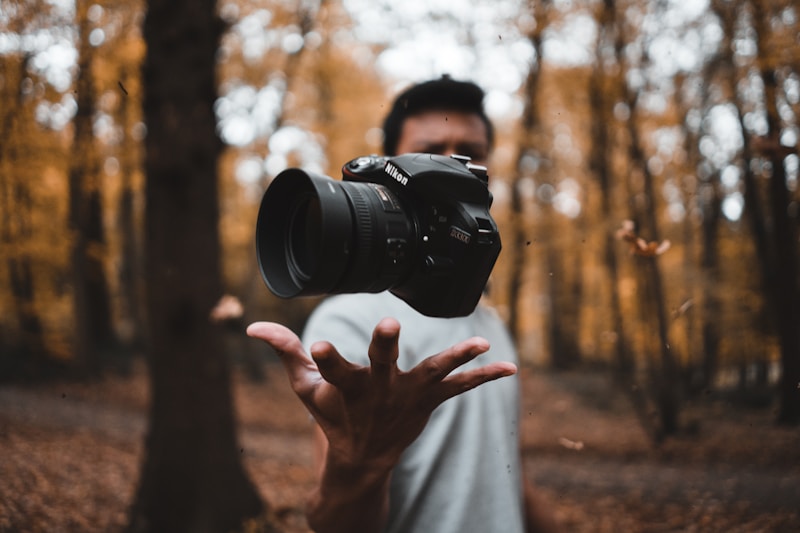
Equipment
You don’t need professional camera equipment. A smartphone with a reasonable camera is fine for most survey work. What matters is technique.
Smartphone tips:
- Keep lens clean (wipe before each site)
- Use tap-to-focus on key detail
- Enable grid lines for composition
- Avoid digital zoom where possible
Lighting
Fire doors are often in corridors with variable lighting.
Good lighting practices:
- Use natural light where available
- Position yourself so light falls on subject
- Use phone torch for dark areas
- Avoid direct flash creating harsh shadows
Problematic lighting:
- Backlit doors (window behind) — move to side
- Very dark corridors — use auxiliary light
- Mixed lighting (daylight + fluorescent) — can create colour issues
Focus and Clarity
Blurry photos are useless. Ensure:
- Camera is steady (brace against body or wall)
- Subject is in focus (tap to focus on key area)
- Sufficient light for sharp capture
- Clean lens
Take an extra second to ensure the shot is clear. It saves time versus retaking later.
Composition
Include context: Don’t zoom in so tight that location is unclear. Include enough of the door/frame to show where the defect is.
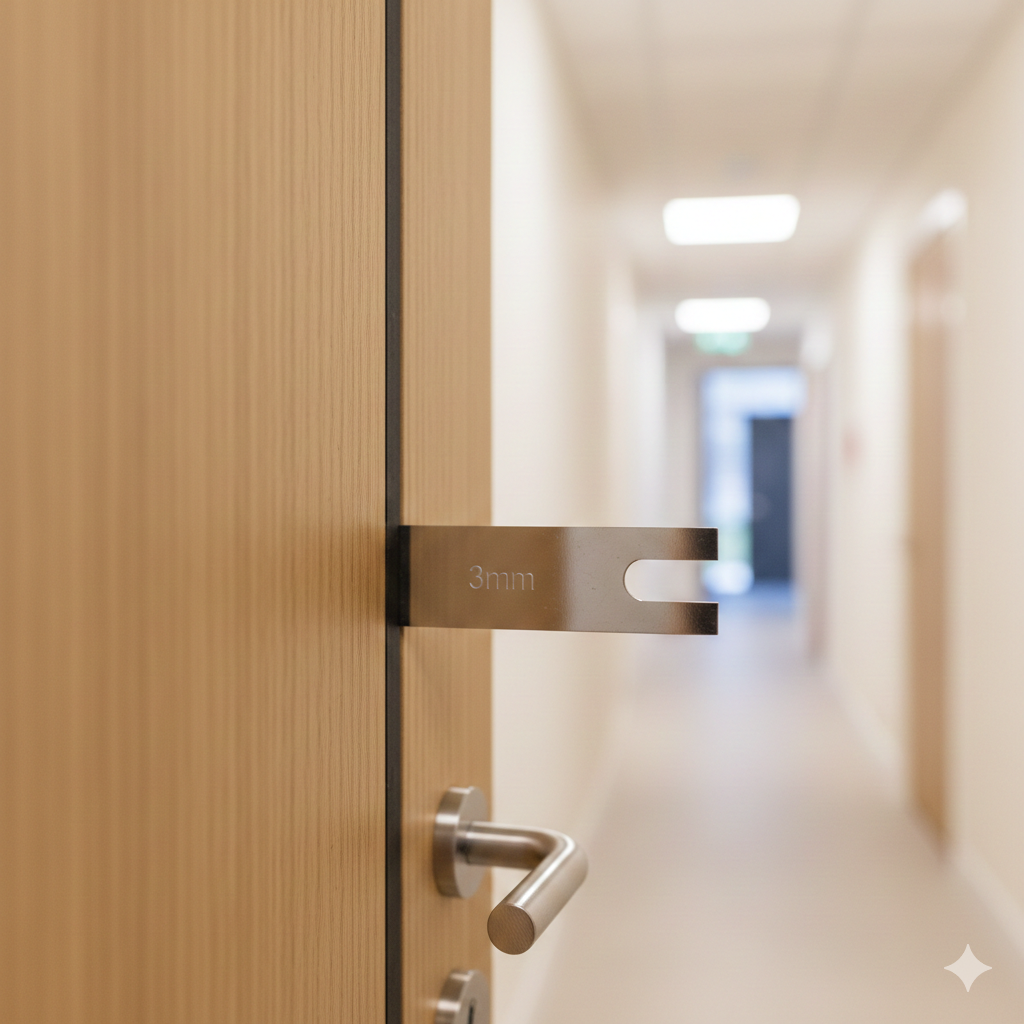
Show scale: For size-relevant defects (gaps, damage extent), include a reference:
- Gap gauge showing measurement
- Your finger for general scale
- Known-size object
Avoid clutter: Frame the shot to focus on what matters. Corridor traffic, bins, and other distractions can obscure findings.
Common Defects: Photo Approaches
Gap Measurements
Best practice:
- Insert gap gauge at measurement point
- Position camera to show gauge reading clearly
- Include enough frame/door to show location
Common mistakes:
- Gauge not fully inserted
- Angle makes measurement hard to read
- Too zoomed out to see gauge
- Fingers obscuring view
Missing or Damaged Seals
Best practice:
- Show empty groove or damaged seal clearly
- Include section showing correct seal nearby (if available)
- Multiple shots if seal missing in multiple locations
Common mistakes:
- Shadow obscures groove
- Too zoomed out to see issue
- Not clear what’s missing
Damaged Door Leaves
Best practice:
- Overview showing extent of damage
- Close-up of damage detail
- Multiple angles if damage is complex
Common mistakes:
- Not capturing full extent
- Glare on surface obscuring damage
- No scale reference
Closer Issues
Best practice:
- Closer visible in frame
- Issue evident (leaking oil, damage, wrong type)
- For operational issues, consider short video
Common mistakes:
- Door obscuring closer
- Issue not clearly visible in still image
Hinge Problems
Best practice:
- All hinges visible (count confirmation)
- Close-up of problem hinge
- Fixing condition if relevant (missing screws)
Common mistakes:
- Only one hinge photographed
- Issue not clear from angle
Missing Signage
Best practice:
- Show both sides of door if sign missing
- Capture where sign should be (eye level on face)
- If sign present but incorrect, show the sign
Common mistakes:
- Photo doesn’t clearly show sign is absent
- No context to identify the door
Workflow Efficiency
Consistent Sequence
Develop a standard photo sequence:
- Door overview (every door)
- Label/certification (if visible)
- Defect close-ups (if defects found)
- Move to next door
Consistency speeds workflow and ensures nothing is missed.
Photo Management
On-site:
- Use survey app to link photos to doors
- Or establish clear naming/numbering system
- Review occasionally to check quality
Avoid:
- Hundreds of photos with no organisation
- Relying on time-stamps to sort later
- Photos in camera roll mixed with personal pictures
Quantity Balance
Too few photos:
- Insufficient evidence
- Gaps in documentation
- Difficult to write reports later
Too many photos:
- Wastes time on site
- Clutters reports
- Processing overhead
About right:
- Overview every door
- Key defects documented
- Enough detail to support findings
- Not excessive duplication
For a standard survey, expect 2-5 photos per door on average. Doors with no defects need only overview. Doors with multiple issues need more.
Post-Survey Processing
Review and Selection
After the survey:
- Review photos for quality
- Flag any that need retaking
- Match photos to door records
- Discard unusable duplicates
Enhancement (Sparingly)
Basic adjustments are reasonable:
- Brightness/contrast for visibility
- Cropping to focus on relevant area
- Rotation if camera was tilted
Do not:
- Edit out or add content
- Alter what the photo shows
- Over-process to the point of unreality
Photos are evidence. Editing to change what they show is dishonest.
Integration with Reports
Effective photo use in reports:
- Placed near relevant text
- Clear captions explaining what’s shown
- Sized appropriately (visible but not oversized)
- Referenced in findings
Poor photo use:
- Appendix of unlabelled photos
- Tiny thumbnails impossible to see
- Photos not connected to specific findings
- Massive files that bloat documents
Special Situations
Occupied Spaces
When surveying in occupied areas (residential flats, offices):
- Avoid capturing people without consent
- Be mindful of personal items visible
- Focus on the door, not the space behind
- Explain what you’re photographing if asked
Security-Sensitive Locations
Some sites restrict photography:
- Check before starting
- Understand what can/can’t be captured
- Get permission in writing if needed
- Respect restrictions (even if inconvenient)
Low-Light Environments
Plant rooms, basements, service areas:
- Use auxiliary lighting
- Multiple flash photos from different angles
- Note limitations in report if photo quality suffers
Equipment Recommendations
Smartphone Photography
For most surveyors, a smartphone is sufficient:
Pros:
- Always with you
- Good enough quality
- Easy integration with apps
- Quick sharing
Tips:
- Mid-range or better phone (older phones have poor cameras)
- Invest in a portable battery pack
- Consider a small clip-on light for dark areas
- Protective case for site conditions
Dedicated Cameras
Some surveyors prefer compact cameras:
Pros:
- Better low-light performance
- Optical zoom
- Separate from personal phone
- Larger batteries
Cons:
- Another device to carry
- Requires photo transfer step
- Additional cost
Photo Storage
Consider:
- Cloud backup enabled on phone
- Sufficient storage capacity
- Regular backup to PC/cloud
- Retention policy matching record requirements
Losing photos through device failure or storage limits is avoidable but happens.
Summary: Photo Checklist
Before site:
- Lens clean
- Battery charged
- Storage available
- App/system logged in
At each door:
- Overview photo captured
- Defects photographed clearly
- Label/certification if visible
- Photos linked to door record
Photo quality:
- In focus
- Adequate lighting
- Subject clearly visible
- Scale reference where needed
- Context sufficient
After survey:
- Photos reviewed
- Quality confirmed
- Integrated with report
- Backed up securely
Good photography is a skill that improves with practice. Review your photos occasionally — identify what works and what doesn’t, and adjust your technique accordingly.
Related Guides
- 11 Most Common Fire Door Defects: what inspections actually find.
- Going Paperless as a Fire Door Inspector: moving from paper to digital surveys.
- How to Survey 50 Fire Doors in a Day: high-volume survey workflow.
This guide provides practical photography advice for fire door inspection. Specific client requirements may vary.
IgnisTrack links photos directly to door records and survey findings, eliminating manual photo management. Start your 14-day free trial to see how integrated photo capture streamlines your workflow.